
Note: I am not an experienced React developer, it is my 2018 project to teach myself React and to blog as I do, so that I learn exactly what is happening and why (see this post for why). If there are any errors in this post or you believe there is a better way to do something please leave a comment and let me know 🙂
Warning: This article assumes you already understand dealing with objects in Javascript. See additional reading notes at the end of the article is you feel you need more information on these topics.
Something I realised I really needed to brush up on when I started to learn React was ES6 and more specifically ES6’s Destructuring Assignment Syntax.
Note: This is a pretty big topic so for this post I’m going to focus on destructuring objects and come back to destructuring arrays another day.
So what is Destructuring?
Destructuring is ES6’s super cool way for extracting data from Javascript objects and arrays and putting that data into their own variables. It uses much cleaner, DRYer syntax than that provided by ES5 and therefore is much more readable too.
For example, if we had an object that looks like this:
const Kirsty = {

   firstName: 'Kirsty',
   lastName: 'Burgoine',
   website: 'kirstyburgoine.co.uk',
   twitter: '@kirstyburgoine'

}

console.log(Kirsty)
We can see the object outputted to our console:
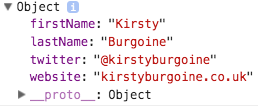
Quick tip: When working with Objects and Arrays and you need to output them to console. Using console.table() instead of console.log() will output the Object into a neat little table that shows the index and the value. 🙂

We could the values for my first name and last name by creating new variables like this:
const firstName = Kirsty.firstName
const lastName = Kirsty.lastName

console.log(firstName, lastName);

// outputs Kirsty Burgoine
That’s fine. It works and it is what I would have done using ES5 syntax. But.. using ES6’s Destructuring we could create two new variables with only one line of code like this:
const { firstName: first, lastName: last } = Kirsty

console.log(first, last);

// outputs Kirsty Burgoine
Yay! 🙂
What happened here?
In the original object, Kirsty, we can see that there are properties for firstName and lastName with values assigned to them. By calling them within curly braces we are using destructuring syntax to create an object pattern on the left of the equals sign. This object pattern is made up of the property names we wish to call and the new variable names we want to assign those values to.
Syntactical naming shortcuts
This still isn’t very DRY though, but, with destructuring syntax we can take this a step further. In this instance, the property names within our object are self explanatory, therefore we don’t need to create new names for them as variables and neither do we need to use something like firstName: firstName. Instead we can use Syntactical naming shortcuts to assign the value of a property to a variable of the same name. Our const would then look like this:
const { firstName, lastName } = Kirsty
Cool right? Ok, to be fair, while this is pretty cool, there are hundreds of tutorials on the internet that explain this, and using very similar examples too (I will link to some of the better ones I’ve found at the end of this post). What I want to show you is the bit that would have saved me loads of time had I understood destructuring properly.
Accessing Nested Data
If we go back to the original object from above but add some pets:
const Kirsty = {

   firstName: 'Kirsty',
   lastName: 'Burgoine',
   website: 'kirstyburgoine.co.uk',
   twitter: '@kirstyburgoine',
   pets: {
      current: {
         cats: 'Harry, Slinky & Blue',
         rabbits: 'Eddie & Gerty',
      },
      lost: {
         cats: 'Neville'
      }
   }

}
We are now dealing with data that is nested more than one level deep. As in our earlier example, we could access the data by doing something like this:
const catsCurrent = Kirsty.pets.current.cats;
const catsLost = Kirsty.pets.lost.cats;

console.log(catsCurrent, catsLost);

// outputs Harry, Slinky & Blue Neville
Simple enough. But, it is a bit of phaff. We could also achieve the same with much simpler syntax using ES6’s destructuring syntax.
const { cats } = Kirsty.pets.current;
Here, all we have done differently is change the object from Kirsty to Kirsty.pets.current to show the path to the data we want to extract
Similarly if we wanted to get both sets of current pets we could do it like this:
const { cats, rabbits } = Kirsty.pets.current;

console.log(cats, rabbits);

// outputs Harry, Slinky & Blue Eddie & Gerty
Gotcha
There is a gotcha here though, notice that I also added lost.cats in my first example. I named the new variables catsCurrent and catsLost so that I knew which referred to what data.
By using ES6’s destructuring syntax and syntactical naming shortcuts I wouldn’t be able to do that in the same way because the code would look like this:
const { cats } = Kirsty.pets.current;
const { cats } = Kirsty.pets.lost;
And would therefore throw this error:

Instead, we could not use the naming shortcut and change it to this:
const { cats: catsCurrent } = Kirsty.pets.current;
const { cats: catsLost } = Kirsty.pets.lost;

console.log(catsCurrent, catsLost);

// outputs Harry, Slinky & Blue Neville
Which would get rid of the error, but it is still a bit ugly and not really any better than our original ES5 solution.
Instead we should go back to our object pattern within our curly braces and amend it to better reflect the structure of the data we want to deconstruct. To get all of the pets data from within the object we would do:
const { pets: { current, lost } } = Kirsty

console.log(current, lost);
Here, we’ve removed the path to the data we want from the object on the right of the equals sign. Then, by adding pets: and assigning a second pair of curly braces, we are defining current and lost as new variables by mirroring their position within the data (i.e. nested inside pets).
By always mirroring the data structure we can get data from any level of nesting. If we only wanted all of the cats names as above we would do it like this:
const { pets: { current: { cats: catsCurrent }, lost: { cats: catsLost } } } = Kirsty

console.log(catsCurrent, catsLost);

// outputs Harry Slinky & Blue Neville
Within the curly braces we are mirroring pets / current and pets / lost and then creating new variables from the cats property in each and renaming them as catsCurrent and catsLost.
Magic 🙂
So how would this have helped me learning React?
Going back to the example I used in the previous post, I have an object full of JSON data from the Github API.

Within this object is a number of nested objects and arrays that I would need to access.
Once I have iterated through the data and assigned keys to each row (see previous post) I can begin to access the data we need. For example to access the users data I would do the following:
const { details } = this.props;
// details is the githubData that has been passed down using props

 const { user } = details
 console.table(user);

Users properties (values excluded as this is live data)
This would give me a nice table of all the user data for each issue in the console.
Looking at the detail that is displayed about each user on the issues table in Github, I only need to display the login and avatar_url. I could write each in long hand in the JSX inside render()in my React App, like this:
// if we hadn't defined the user variable
{details.user.login}
// using the user variable
{user.login}
And repeat them each time I need to display them. This works but it is still a bit ugly, so lets make it DRYer like this:
const { user: { login, avatar_url } } = details

// Using JSX inside render()
{login}
{user_avatar}
More magic 🙂
Further Reading
- A Dead Simple intro into Destructuring Javascript Objects – Wes Bos – This was the lightbulb moment.
- Introduction to Commonly Used ES6 Features – Zell Liew
- The Most In-Depth Yet Understandable ES6 Destructuring Tutorial (complete with Assembled Avengers) – Mike Evans
- Destructuring Assignment – MDN Web Docs
I would also highly recommend the ES6 Video Tutorial from Wes Bos too. 🙂


